Adding Okta OpenID Connect (OIDC) To Azure Functions

Azure functions now support authentication with a custom OpenID Connect provider, though this is in Preview. This is a quick set of documentation on how to integrate a new Azure Function with your Okta configuration. For more help, or to migrate your existing functions to Okta, do not hesitate to reach out to [email protected].
Create New Azure Function
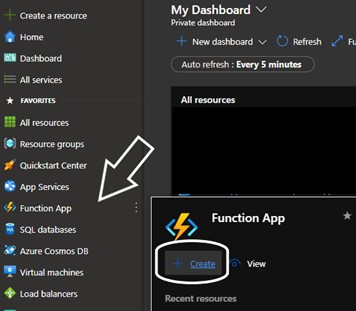
In order to setup Azure functions with Okta OpenID Connect (OIDC) authentication, you start by creating a new Azure function in the Azure dashboard. Provide the subscription and resource group, along with the App name. In this case, we will use a Node.js function for simplicity.
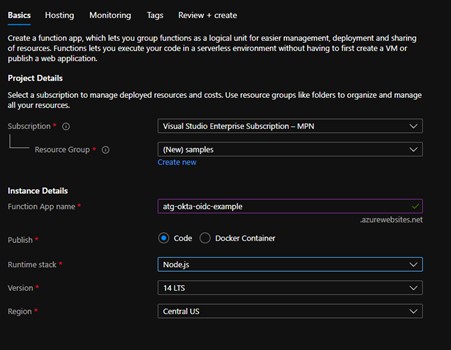
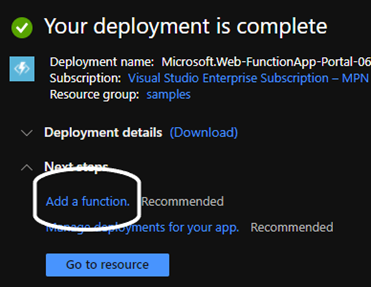
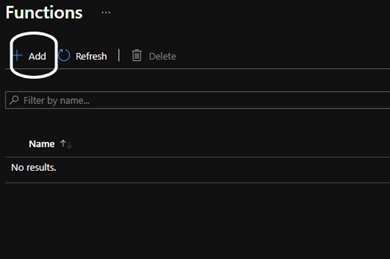
For this example, we will select "Review and Create" at the bottom of the page, then select "Create". Once the Function App is deployed, it will show an option to "Add a function". Select this and then select the "Add" button at the top of the page. For this demo we will use the HTTP trigger template, and call the function "say-hello".
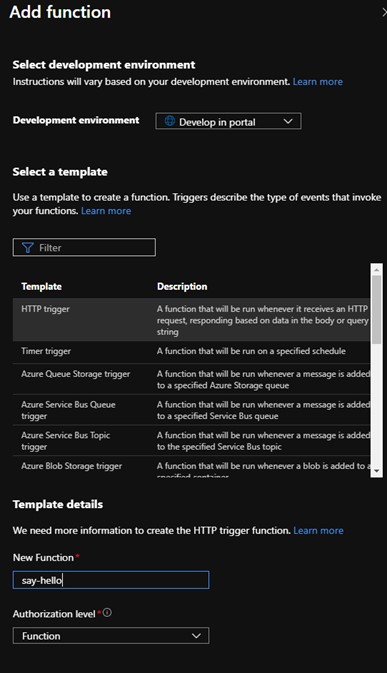
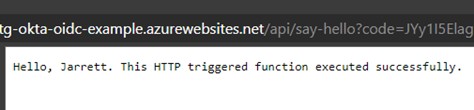
Click the "Add" button and then you will be taken to the Function page. At this point, you should be able to navigate to the function URL and see an output. The base application name (in this case: "atg-okta-oidc-sample" is created as a subdomain of "azurewebsites.net". This will validate your function is running. You can also click the "Get Function URL" button at the top and it will provide the endpoint you can hit. To see your name displayed on the HTTP page, simply append "&name=<your name>" to the URL. For example, my URLs are:
Function App URL: https://atg-okta-oidc-example.azurewebsites.net/
Function URL: https://atg-okta-oidc-example.azurewebsites.net/api/say-hello?code=<special code>
Function URL with my name: https://atg-okta-oidc-example.azurewebsites.net/api/say-hello?code=<special code>&name=Jarrett
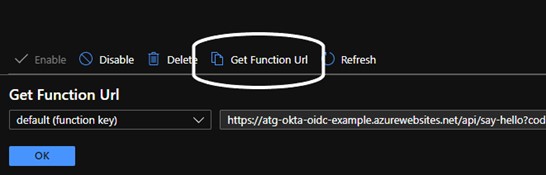
Now that our function is working, we can add OIDC using Okta.
Setup App in Okta
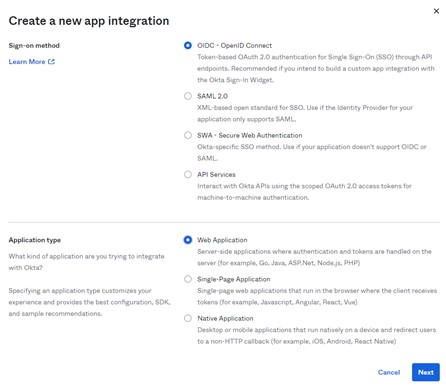
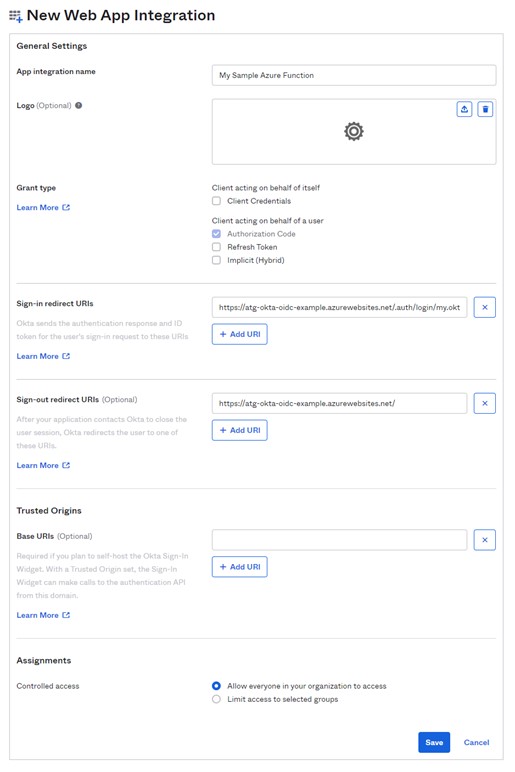
Navigate to your Okta tenant, then login to the admin dashboard and navigate to "Applications" => "Applications". From this page, select "Create App Integration". You will see a wizard appear – select the OIDC Web Application options and hit Next. Name the application, and the set the Sign-in and Sign-out redirect URIs. The Sign-out will be the same as your Function App URL, the Sign-in will be the Function App URL appended with ".auth/login/<idp name in azure>/callback". We have not configured the Identity Provider (IdP) name in Azure yet, so whatever is put here – while it can be updated – will be that name. In this case, I will name my IdP in Azure "my.okta.auth" so my URLs are:
Sign-in: https://atg-okta-oidc-example.azurewebsites.net/.auth/login/my.okta.auth/callback
Sign-out: https://atg-okta-oidc-example.azurewebsites.net/
For the Assignments, you can select everyone or limit to a group. In this case, we are going to let everyone who can access Okta, access this application. Click Save and the Okta Application is created.
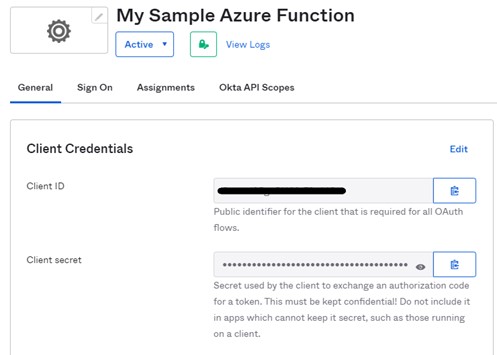
Now that the application is created, it has an ID and a secret. Be sure to treat this a secure username and password. It is easiest to leave this page up, and open a new tab to the Azure portal, as we'll need both of these values for the next steps.
Configure Your IdP in Azure
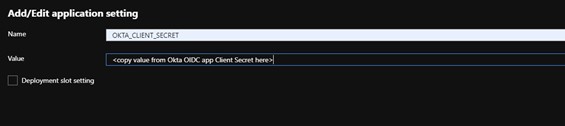
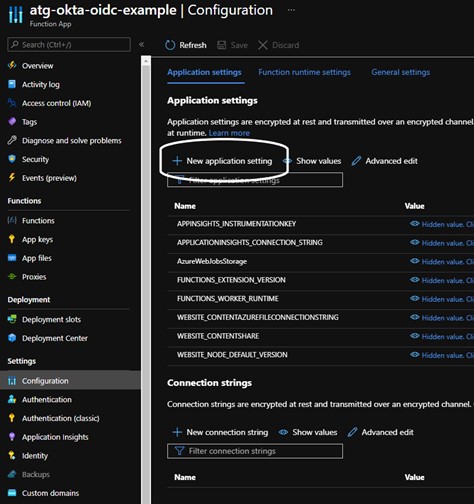
Navigate back to the Azure Portal, then select "Function App" and the name of your app. You will see a Overview page. Now navigate to the "Configuration" option under settings and select "+ New application setting". This will be where we put in our Okta Client secret from our OIDC application. Name it (in this case I have used "OKTA_CLIENT_SECRET") and then hit Ok. Do not forget to hit the "Save" button at the top of the page to save your changes!
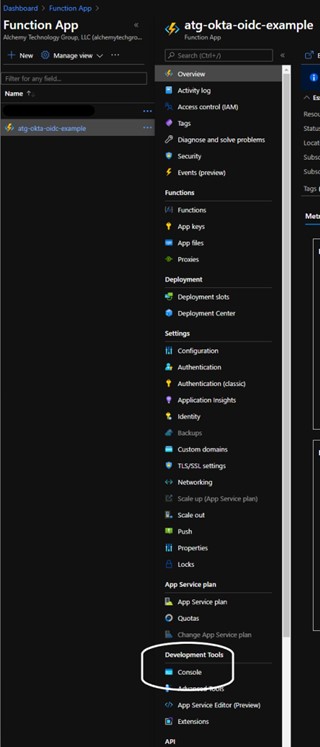
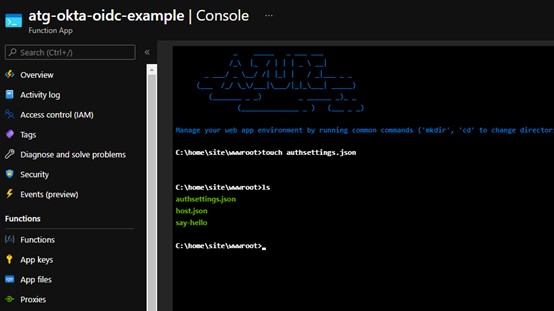
Towards the bottom under "Development tools" you will see a "Console" selection. Select this, and it will present a terminal within your application. In this terminal, we will run "touch authsettings.json" to create a JSON configuration file. We can view all files with the "ls" command.
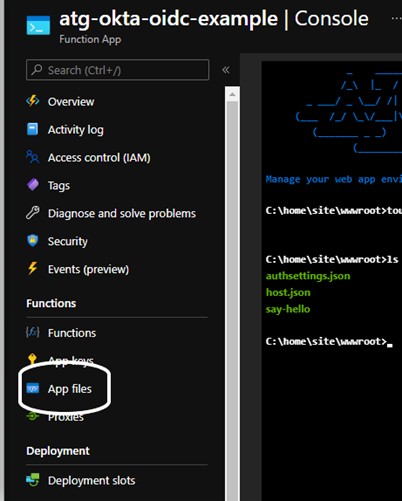
Navigate to "Functions" => "App files" and then select the "authsettings.json" file from the drop down at the top.
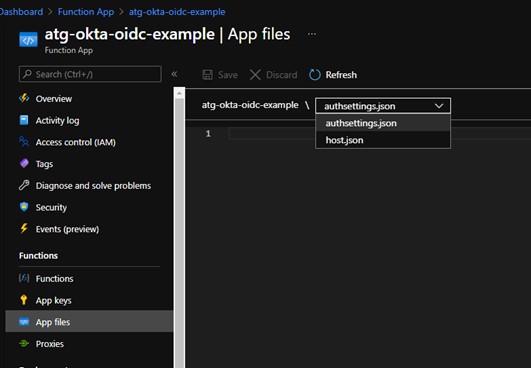
This presents an empty file that we can populate with our identity provider information. The full file reference can be found within Microsoft Documentation. Populate the authsettings.json with the correct JSON information, my example is posted here:
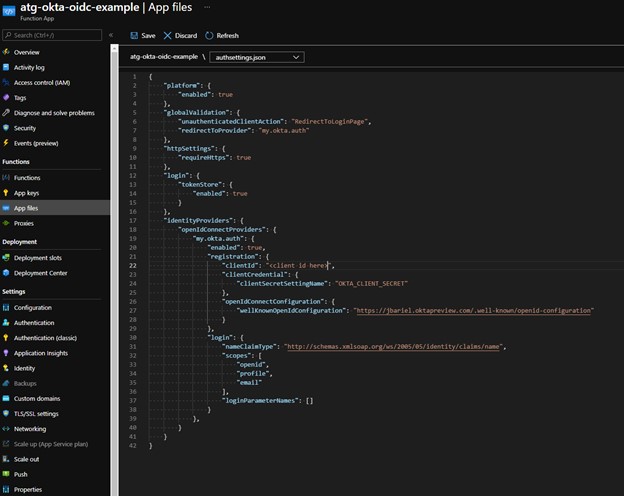
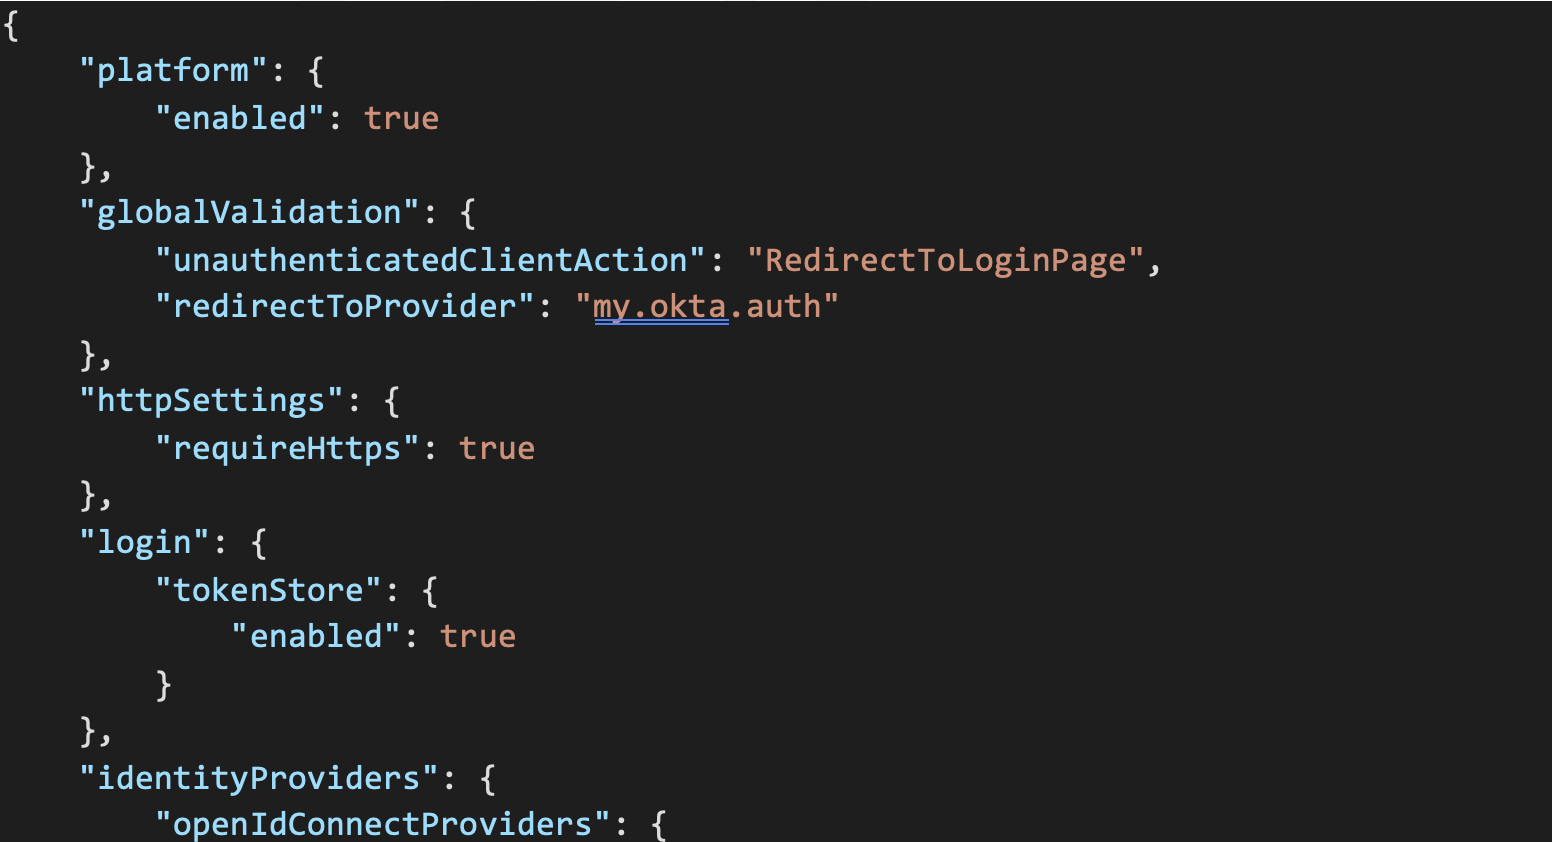
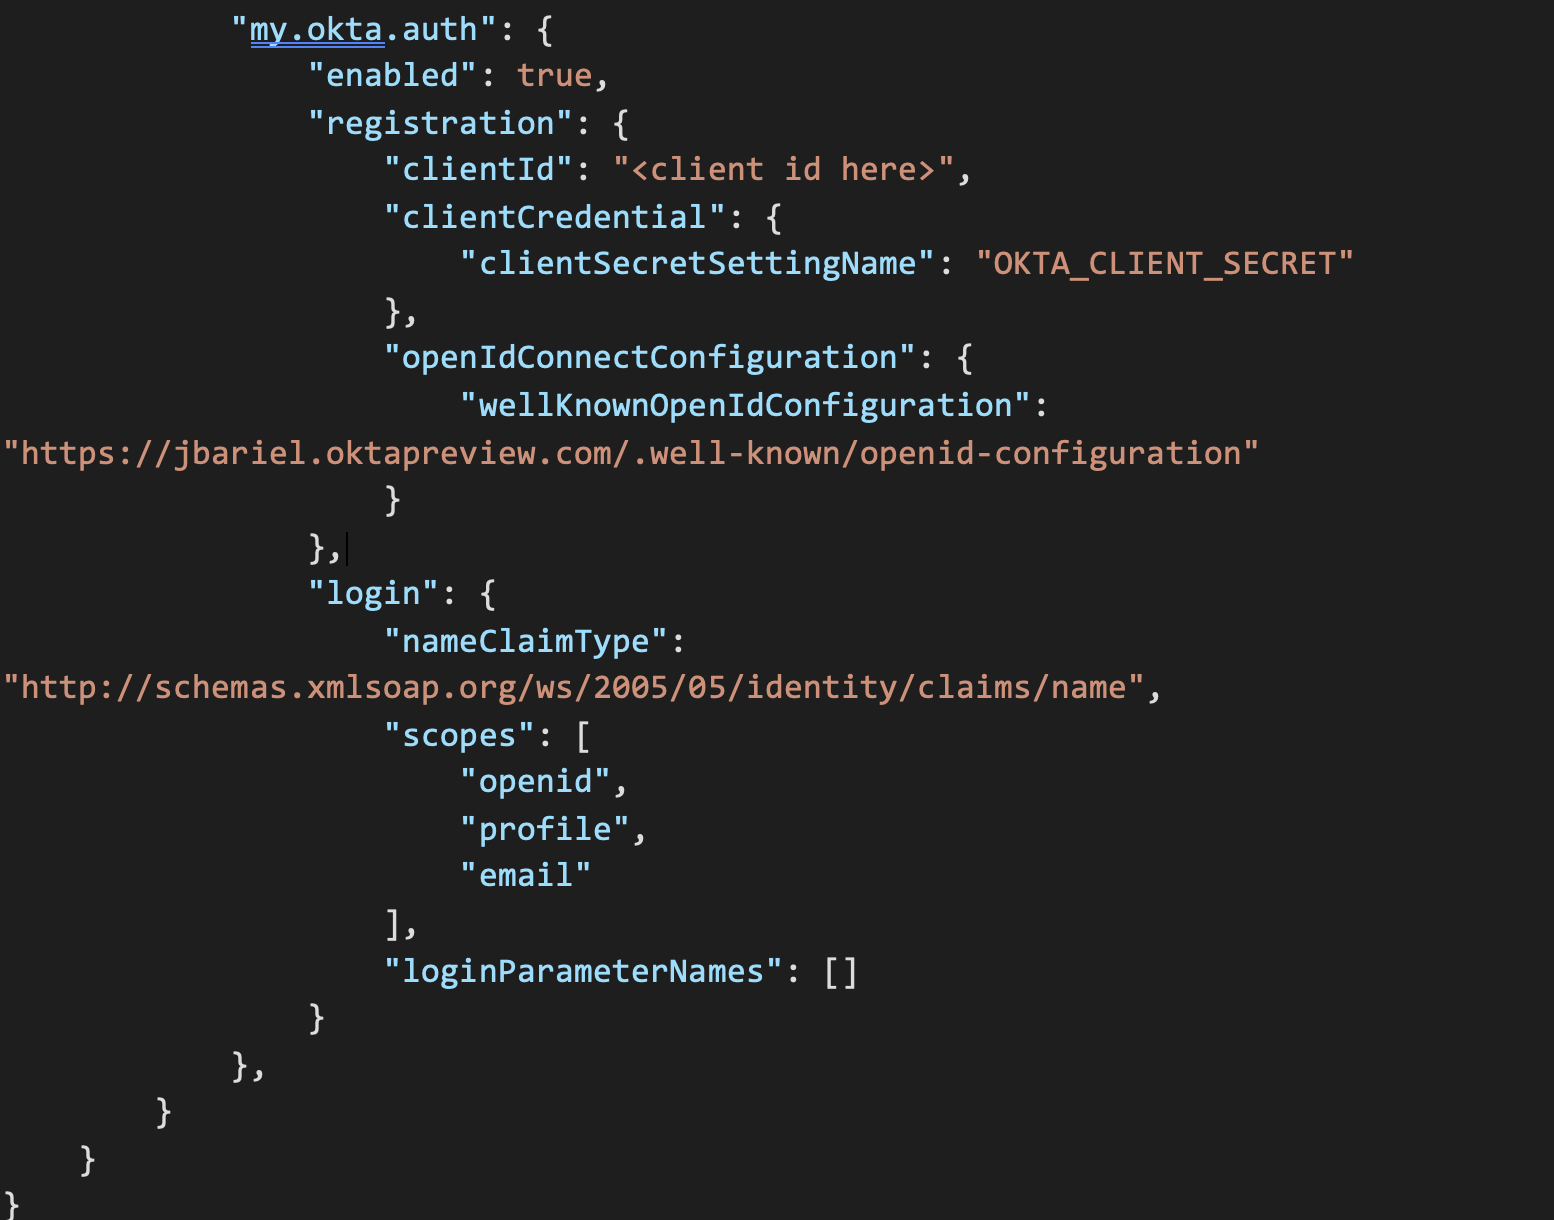
Be sure to use whatever you named your IdP in the Okta OIDC App Sign-on URL, set the correct application configuration key name for the client secret, and update your Okta tenant well known configuration endpoint. When your configuration is setup, hit the "Save" button to persist your changes. For more information on the "well-known" endpoint from Okta, you can refer to their developer documentation.
Making Azure Use Your Configuration File
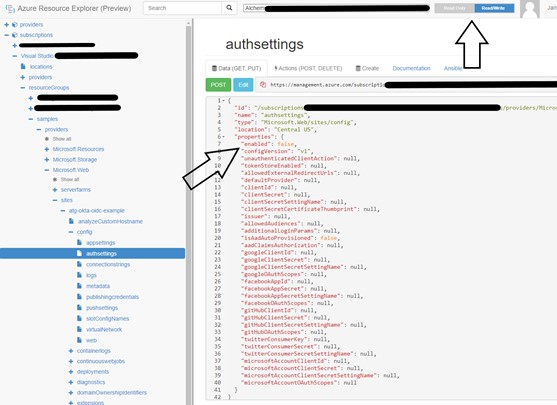
Now we need the application to use our configuration file, so we will go to the Azure Resource Explorer. As we are already logged into Azure, this will show the Resources available. You will need to navigate to:
subscriptions//resourceGroups//providers/Microsoft.Web/sites//config/authsettings.
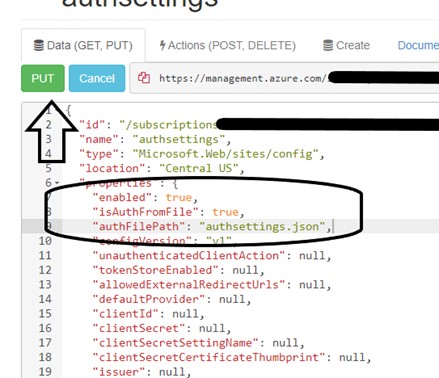
This JSON file configures auth for your Function App and is how we will tell Azure to use your authsettings.json file. Select the "Read/Write" button at the top of the page, and then the "Edit" button at the top of the JSON file. Modify the "enabled" value inside of "properties" from "false" to "true".
Then add two additional properties of "isAuthFromFile" with a value of "true" and "authFilePath" with a value of "authsettings.json". Select the "PUT" button to save the changes.
Test it!
Now we can test the function. I would suggest using a different or Incognito/InPrivate browser to ensure you are forced to login to Okta. Navigate again to the Function URL with a name parameter (https://atg-okta-oidc-example.azurewebsites.net/api/say-hello?code=<special code>&name=Jarrett) and you will be required to login to Okta before you can see the success page!
Summary
This is just the first step in ensuring that your Azure functions are protected and managed just like any other application in your environment. For more on this, or to get help improving your security posture please contact us at [email protected].
Author
 Jarrett Bariel