Provisioning Active Directory Accounts with EntraID
Meeting the provisioning requirements of an organization can be a challenge. EntraID often meets these needs but has historically failed to provision cloud accounts into Active Directory. Although some SaaS applications like Workday have built-in connectors to handle this task, EntraID has lacked this capability until now.
This blog post outlines the prerequisites and steps required to set up EntraID to provision cloud accounts into Active Directory.
Prerequisites:
- Access to the EntraID portal with Application Administrator and Hybrid Identity Administrator roles.
- A domain-joined Windows server to install and configure the provisioning agent.
Step 1 – Create the Provisioning application
- From the Entra ID portal, create a new Enterprise Application.
- Search for: “API-driven provisioning to on-premises Active Directory.”
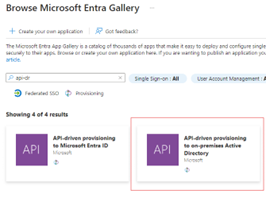
- Once the application has been created, select the “Provisioning” option.
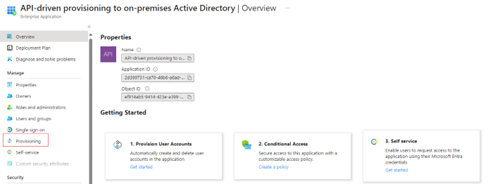
Step 2 – Configure Inbound provisioning to Active Directory
- Select “Getting Started,” set the provisioning mode to “Automatic,” and enter the necessary domain and OU information.
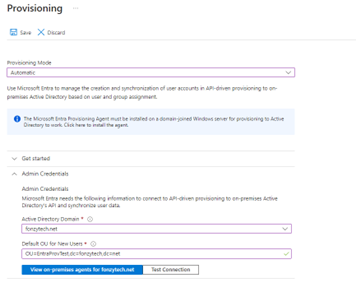
- Select the option to view on-premises agents.
- Download and configure the provisioning agent on the on-premises domain joined server.NOTE: The instructions for configuring this agent are located here: https://learn.microsoft.com/en-us/entra/identity/hybrid/cloud-sync/how-to-install
- Test the connection to make sure EntraID can connect to the provisioning agent.
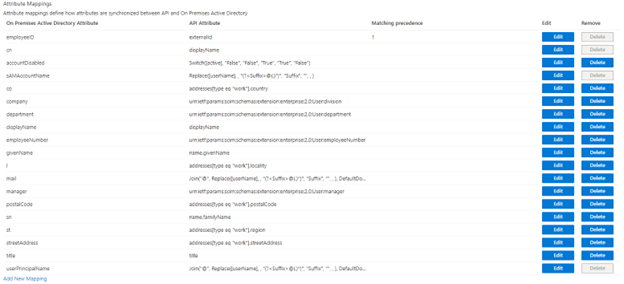
- Expand the mappings section, select the hyperlink, and review the default mappings.
- Expand the settings section and enter a valid email address.

- The last step is to grant access to the inbound provisioning API. Those steps are documented here: https://learn.microsoft.com/en-us/entra/identity/app-provisioning/inbound-provisioning-api-grant-access.
Following these steps, you can effectively set up EntraID to provision cloud accounts into Active Directory, ensuring your organization’s needs are met efficiently and reliably.
Author
 Alchemy