If you’re familiar with Ivanti’s Environment Manager Policy product, you’re probably familiar with its best uses – acting as the user or system inside the local session, on the local endpoint.
It excels at conditionally modifying and configuring the user’s present session, within the confines of the machine. What it has never been fantastic at however, is acting administratively, outside the endpoint and session, on the user’s behalf.
Now to be completely fair, the product was not designed to do this natively, and while it CAN be done via some clever powershell scripting, it’s always been ill-advised to do so.
Enter Ivanti’s acquisition of the RES Automation platform – a best of breed, cross-platform infrastructure and desktop automation suite, purpose built to make mincemeat of complex and repetitive infrastructure tasks.
Until recently, Environment Manager Policy and RES Automation were separate beasts. However, with the release of User Workspace Manager 2019.1, Automation integration has come to EM Policy in the form of configurable actions.
This means that from almost any trigger within EM Policy, and per any condition, we can now call an automated process from a RES dispatcher, pass custom, just-in-time-defined Parameters to it, and have an external administrative actor complete complex tasks on behalf of our user.
Infrastructure Setup and Prerequisites
To get this going, there are a few things we need to have set up already:
- A functional UWM Management Center infrastructure for deploying EM policy
- Environment Manager agents on endpoints
- A functional RES Automation infrastructure with dispatcher
- The RES Automation agent on endpoints
- A RES Automation agent on a Domain Controller
In addition to the base installations above, each needs some configuration modifications in order to work.
PKI Pre-Requisites:
To use Automation in an EM Policy, we need a “Run As” user configured. In order to do that, there needs to be certificate trust between the policy and the endpoints to which it is deployed.
The easiest way to do this is to generate a self-signed certificate on the UWM Management Server where the EM policy is edited. Details on the process for creating a Self-Signed Cert are outside the scope of this guide, but can be found online.
Once this certificate is generated, it needs to be adopted into the EM policy’s Run-As User Library section:
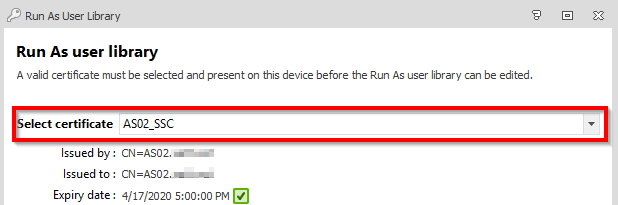
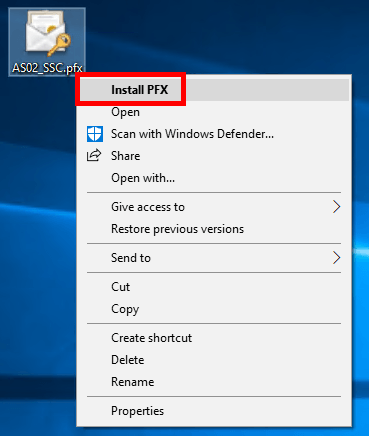
It also needs to be imported into the Local Machine’s Personal certificate store on ALL endpoints where you wish to deploy this policy.
A certificate can be deployed in many different ways, do so in whatever way fits your organization. Below we are adopting one manually:
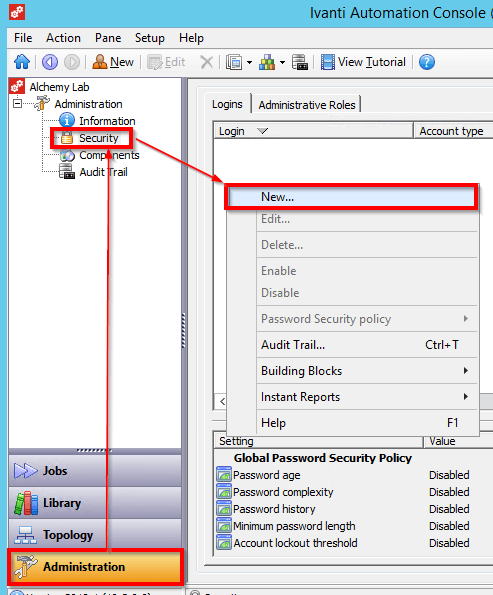
Administrative Account
An administrative service account needs to be specified in order to connect and communicate with the RES Automation Dispatcher. For simplicities sake, below I’ve used a user account that is a domain administrator in this environment, however using a dedicated service account would of course be preferable.
First add this account to the Run As user library in the EM policy:
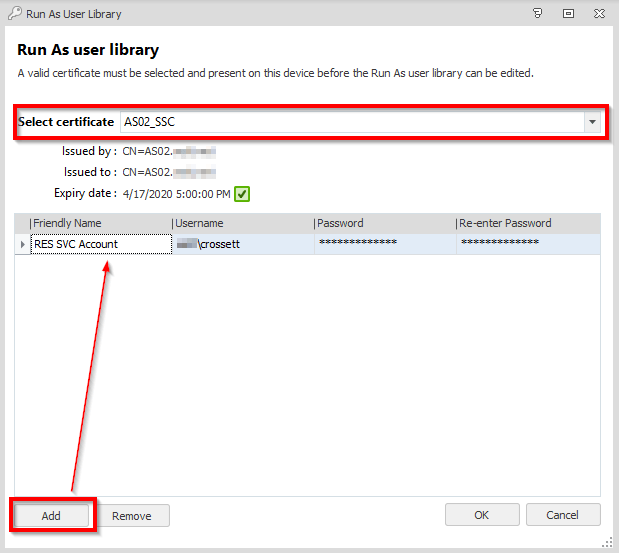
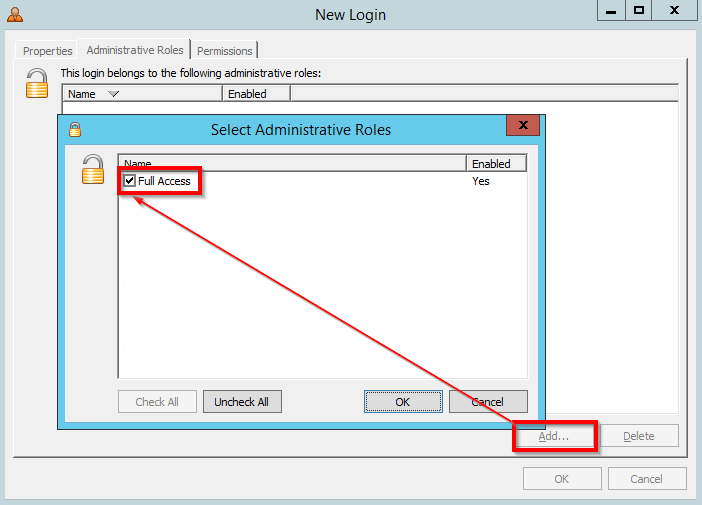
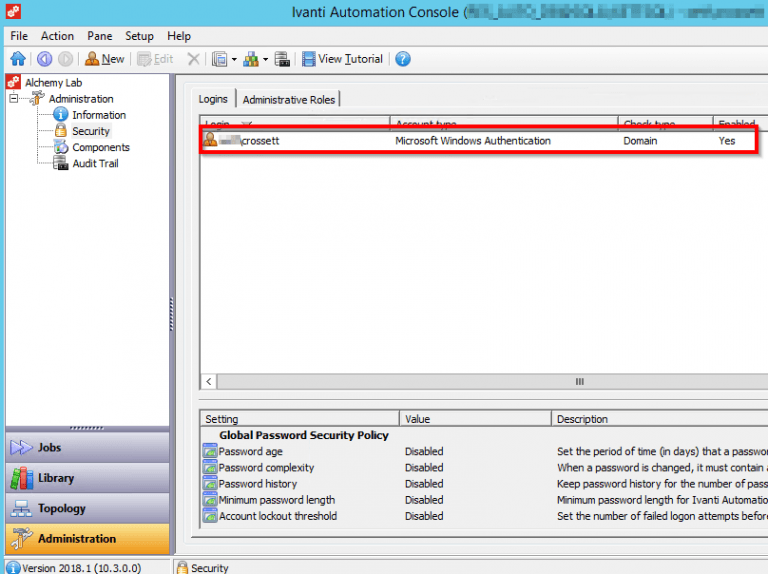
Then give this account login and control authority in the RES environment:

Dispatcher WebAPI
The EMagent on the endpoints will contact the RES automation dispatcher via its web API– a functionality that is not enabled by default.
To enable it, configure the following Global Setting on the target dispatcher:


Automation Module
With all the infrastructure setup out of the way, we can now get down to the Automation Module and EM Policy configuration.
We’ll start with configuring a simple Automation Module that will be called via EM Policy action. As of UWM 2019.1, both Automation Modules and Projects can be called from EM Policy and parameters passed through to them.
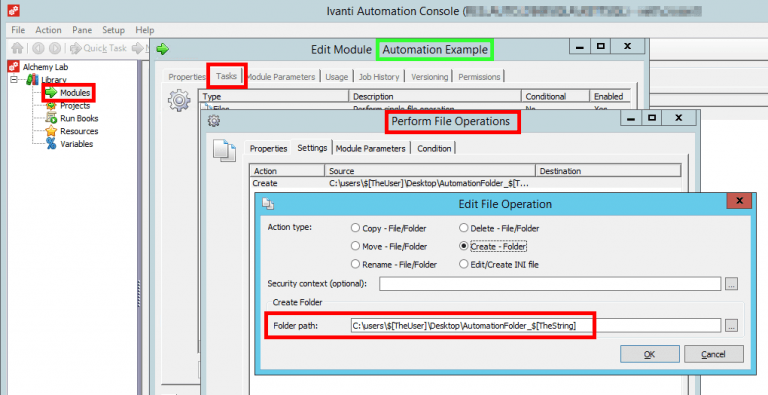
For a very simple example, this Module will run a Task to create a custom folder on the user’s desktop, based upon the content of some Parameters we’ll pass at run time.
Create a new RES Automation Module with the following Parameters and Tasks:
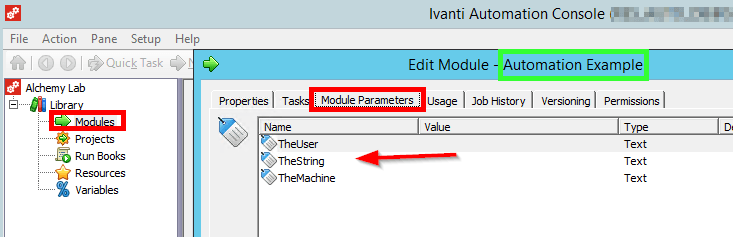
As we can see, there are several parameters created in the Module. Parameters are really just variables for holding data.
These Parameters are then called via the $[Parameter] format in the tasks of that module. We’ll define the actual values for the Parameters later on in the EM policy.
EM Policy
Now in the EM policy, we need to link the policy to the Automation Dispatcher. This is done via the “Automation Settings” item in the ribbon. Specify the server, port and service account to be used (all of which we configured earlier):
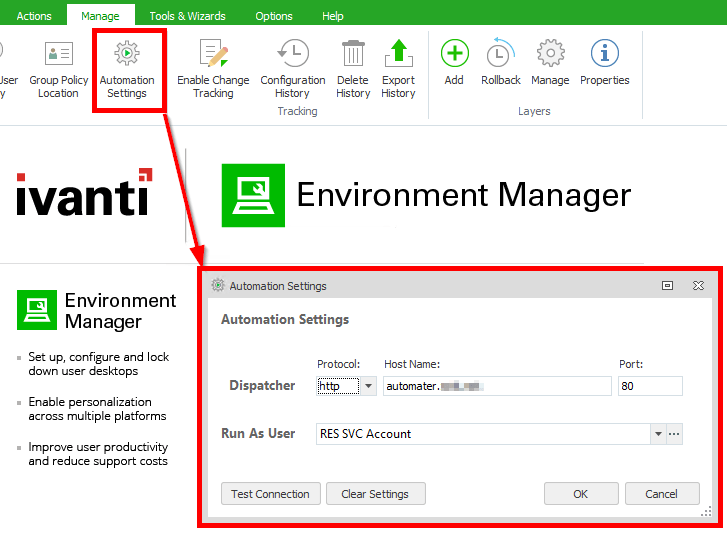
Hitting “Test Connection” should bring up a list of defined modules and projects in the target dispatcher.
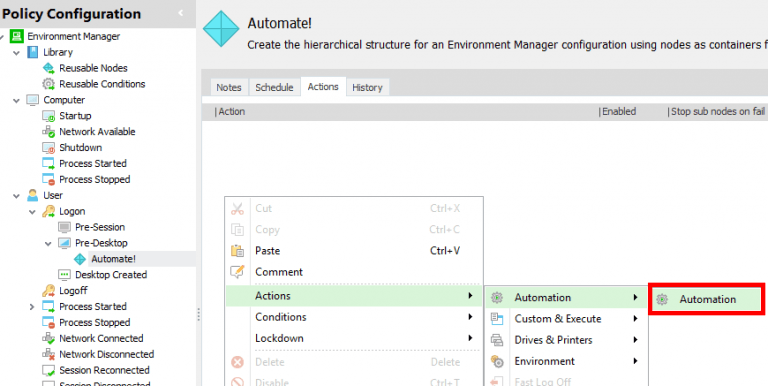
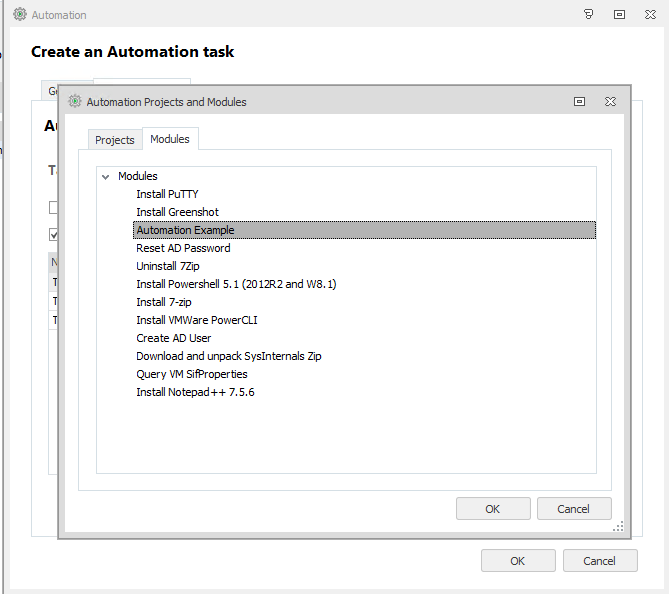
Now create a new node wherever you like. Below we’ve done so in Pre-Desktop, but for testing it may be easier to do it as a Process-Start action. In this node, create a new Automation Action and select the appropriate module (in this case, our Automation Example module)
Check the box “Override Parameters” and specify the values we want to pass back to the automation server. Note that we can pass environment or session variables from the current user’s session into the Parameters for Automation. EM will evaluate the values of these locally defined variables and pass the results up to Automation as the Parameter values:

That’s it! Save and deploy this policy to a test endpoint. At logon (or whatever trigger you used), there will be a folder created on the desktop! We can also validate that the Automation call succeeded by looking at the Job History on the dispatcher:

Here we can see that the task was run locally on our test endpoint (W10WS02) by its agent, and that the File Operation task log shows the folder creation:

Getting Tricky
Now, naturally you’d say “But we can create folders in EM much more quickly!”, and you’d be right! This was a simple example, so lets work through a more complex one involving making changes to the user’s Active Directory object on their behalf.
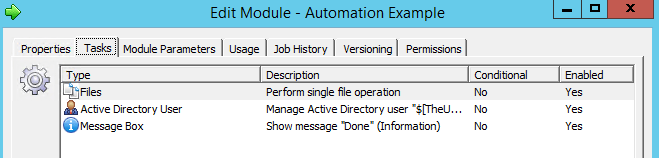
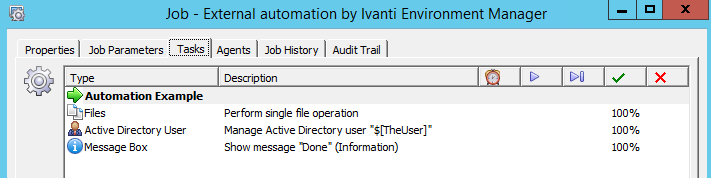
Edit the existing Automation module, and add two tasks: A “Manage Active Directory User” and a “Message Box”.
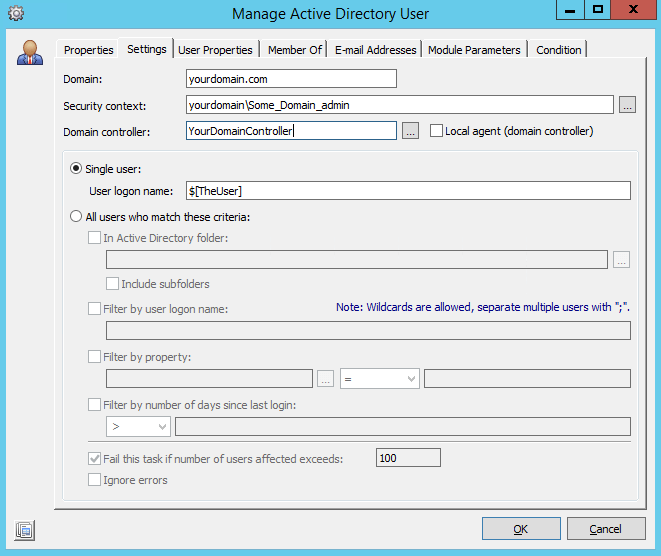
For this example, we’re going to modify our current user’s AD object by adding a string to their Description attribute, as well as adding them to a specific security group. Configure the Settings tab as follows, substituting for your environment as appropriate:
Now in the “User Properties” tab, select the “Description” user field and specify it’s value. Here we’re using a parameter that will be passed up by EM:

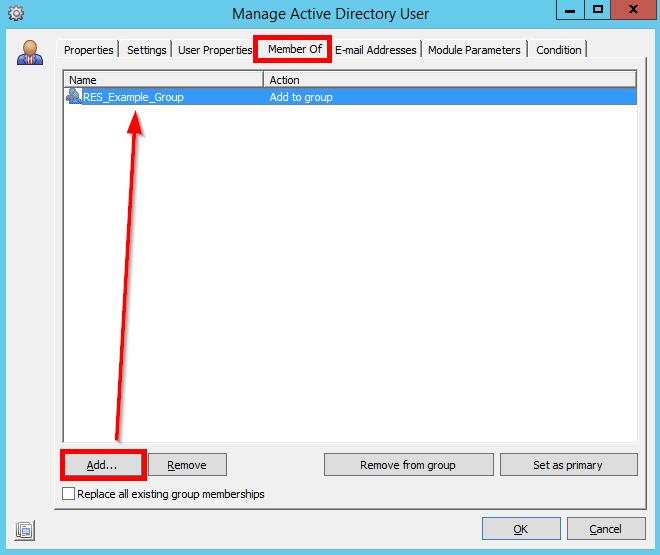
Next, head to the “Member Of” tab and specify a group that the target user will be added to:
Finally, set up the ‘Show Message Box’ task as follows:

Now here is the great part – because the Environment Manager policy references the Module within Automation, there is NO NEED to redeploy or change the existing EM Policy!
Every new call of the Automation Action in the EM policy will automatically use the latest, updated, version of our Automation Module. Go ahead and trigger it – a folder will be created on the desktop, then the AD user will be modified, and finally the user will see a message box.
Auditing the Outcome
If we look in the Job History in automation and double-click into the Modules log, we can see the Parameter values that EM passed up to automation, as well as whether each Task in the module succeeded or failed:
Finally, we can double-check in AD to see the modified user with new description and group membership:


Obviously this only scratches the surface of what can be done with user-initiated infrastructure actions, but we hope it gets you inspired to think differently about how processes are initiated within your environment.
About the Author: Adam Crossett is a Senior Consultant with Alchemy and has been delivering User Virtualization solutions to the enterprise for almost 10 years.